| Mobile App v5.1.x |
Mobile App v5.3.x |
Completing the Corrective Action Screen
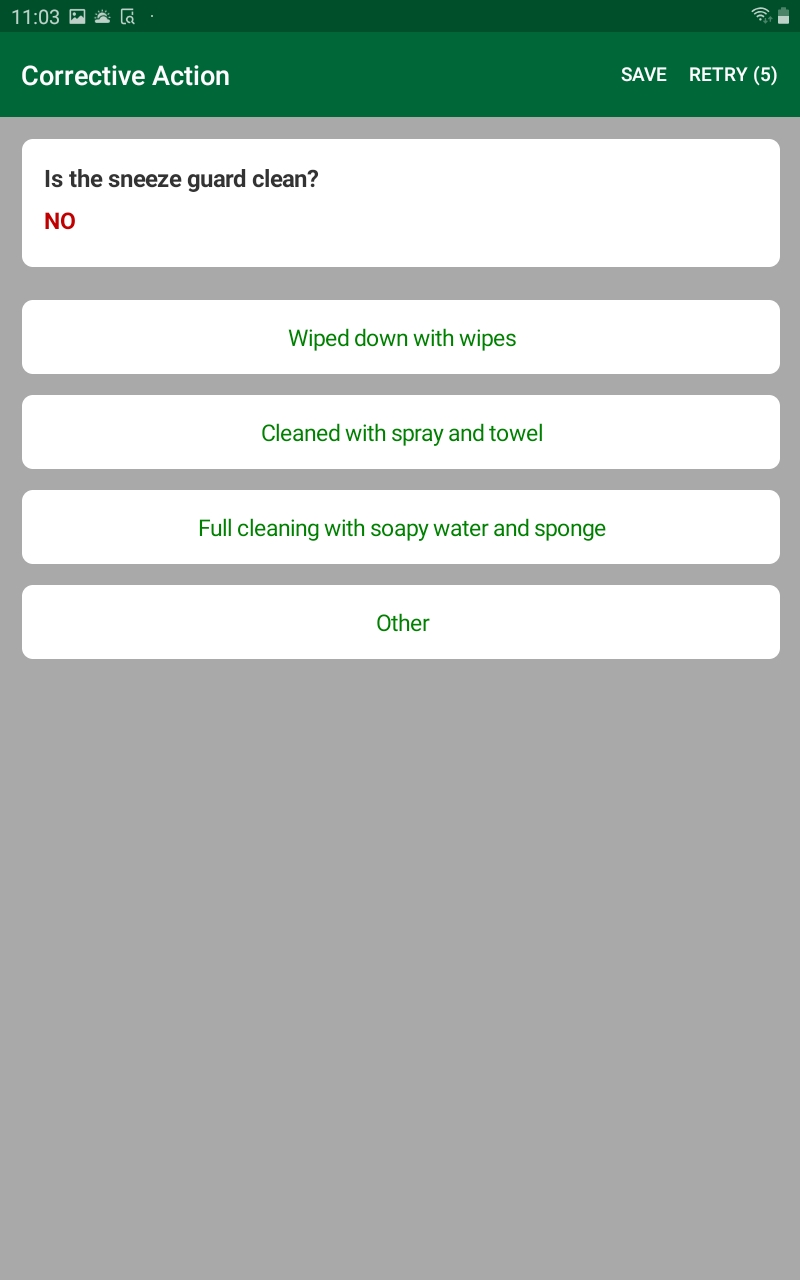
If the response entered for a checklist item was not valid and a corrective action has been set up through the Server App, the Corrective Action form appears:
- For Probe, Numeric, and Manual Temperature items, unacceptable is defined as being either above or below the accepted range.
|
|
For Yes/No items, unacceptable is always No.
|
For Yes/No items, Yes or No could be unacceptable depending on what is defined for the list item.
|
|
The banner at the top of the form contains the following:
- The Retry button, if enabled, which allows you to enter a new response:
- The number in parenthesis indicates how many retry events are still available.
- If no retries remain, the button does not appear.
- The Save button, which allows you to save the information you enter for the corrective action.
The top of the form contains the following:
- The List Item Name
- Your Response
The bottom of the form lists the available Corrective Actions:
- If enabled, there is also an Other option that, when selected, allows you to describe what actions you took. It is possible that this is the only action available.
|
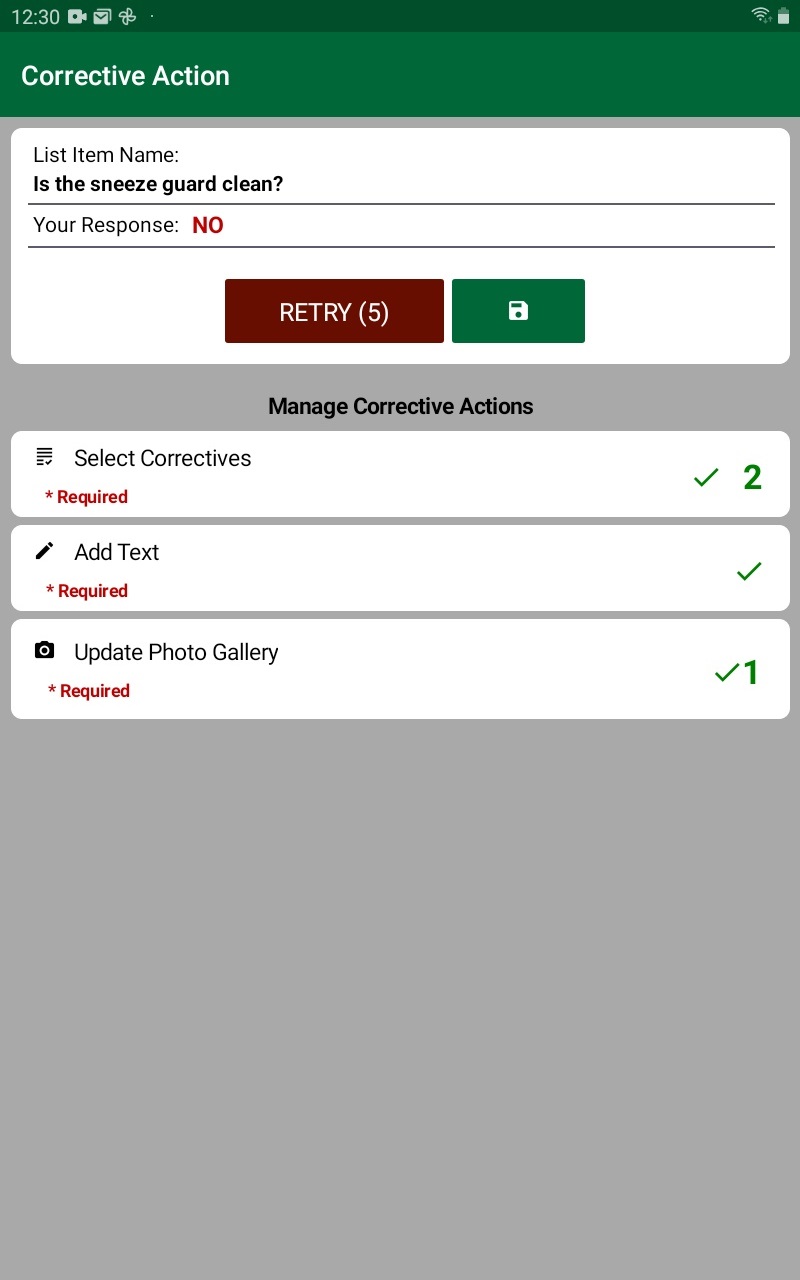
The top of the form contains the following:
- The List Item Name
- Your Response
- The Retry button, if enabled, which allows you to enter a new response:
- The number in parenthesis indicates how many retry events are still available.
- If no retries remain, the button does not appear.
- The Save button, which allows you to save the information you enter for the corrective action.
The bottom of the form allows you to Manage Corrective Actions taken. Which of the following appears depends on how the corrective action was configured for the checklist item; however, they are typically completed in the following order:
- Use Select Correctives to choose from a list what actions were taken when addressing the invalid condition:
- If enabled, there is also an Other option that, when selected, allows you to describe what actions you took. It is possible that this is the only action available.
The number of actions you select is identified by the number that appears to the right of the card (the default is 0).
- Use Add Text to add comments to the corrective action record:
- This is an optional function that may or may not be enabled for this corrective action:
- If enabled, this function may or may not be required.
If you have entered a comment, a checkmark appears on the right side of the card.
- Use Update Photo Gallery to add one or more photos to the corrective action record:
- This is an optional function that may or may not be enabled for this corrective action:
- If enabled, this function may or may not be required.
The number of photos you have added appears to the right of the card (the default is 0).
- When finished, tap the save button to save the corrective action record:

- If you have completed all required into for the corrective action, the checklist proceeds as follows:
- If there are additional items on the list to be completed, the form for the next item on the checklist appears.
- If the item you just completed is the last item on the list, the list of checklist items appears
- If you have not completed all required input for the corrective action, an error message appears:
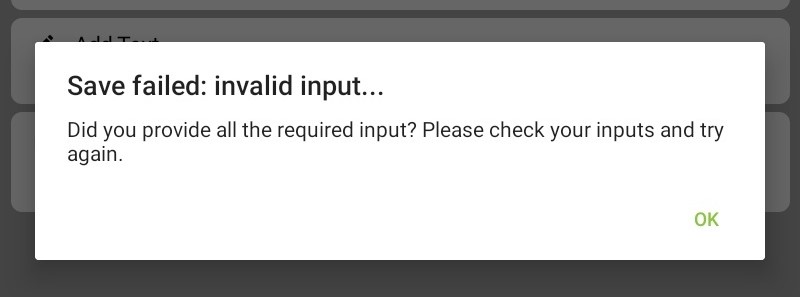
- Tap OK, enter the required input, and try saving the correction action record again.
|
Retrying Your Response to a Checklist Item
|
|
To enter a new value, carry out the following:
- Tap RETRY on the banner. The appropriate checklist item form appears:

- Enter a new response.
- If your new response is valid, the checklist will proceed as follows:
- If there are additional items on the list to be completed, the form for the next item on the checklist appears.
- If the item you just completed is the last item on the list, the list of checklist items appears.
- If your new response is not valid, the Corrective Actions screen appears again:
- If the Retry button appears, it means you have at least one more opportunity to retry entering your response or you can proceed with the corrective action using the last value entered.
- If the Retry button does not appear, you must proceed with the corrective action using the last value you entered.
|
To retry your response to a checklist item, carry out the following:
- Tap the Retry button on the Corrective Actions screen:

The appropriate checklist item screen appears.
- Enter a new response.
- If your new response is valid, the checklist will proceed as follows:
- If there are additional items on the list to be completed, the form for the next item on the checklist appears.
- If the item you just completed is the last item on the list, the list of checklist items appears.
- If your new response is not valid, the Corrective Actions screen appears again:
- If the Retry button appears, it means you have at least one more opportunity to retry entering your response or you can proceed with the corrective action using the last value entered.
- If the Retry button does not appear, you must proceed with the corrective action using the last value you entered.
|
Selecting Corrections
To select a corrective action for a checklist item where the response provided was not valid, carry out the following:
|
|
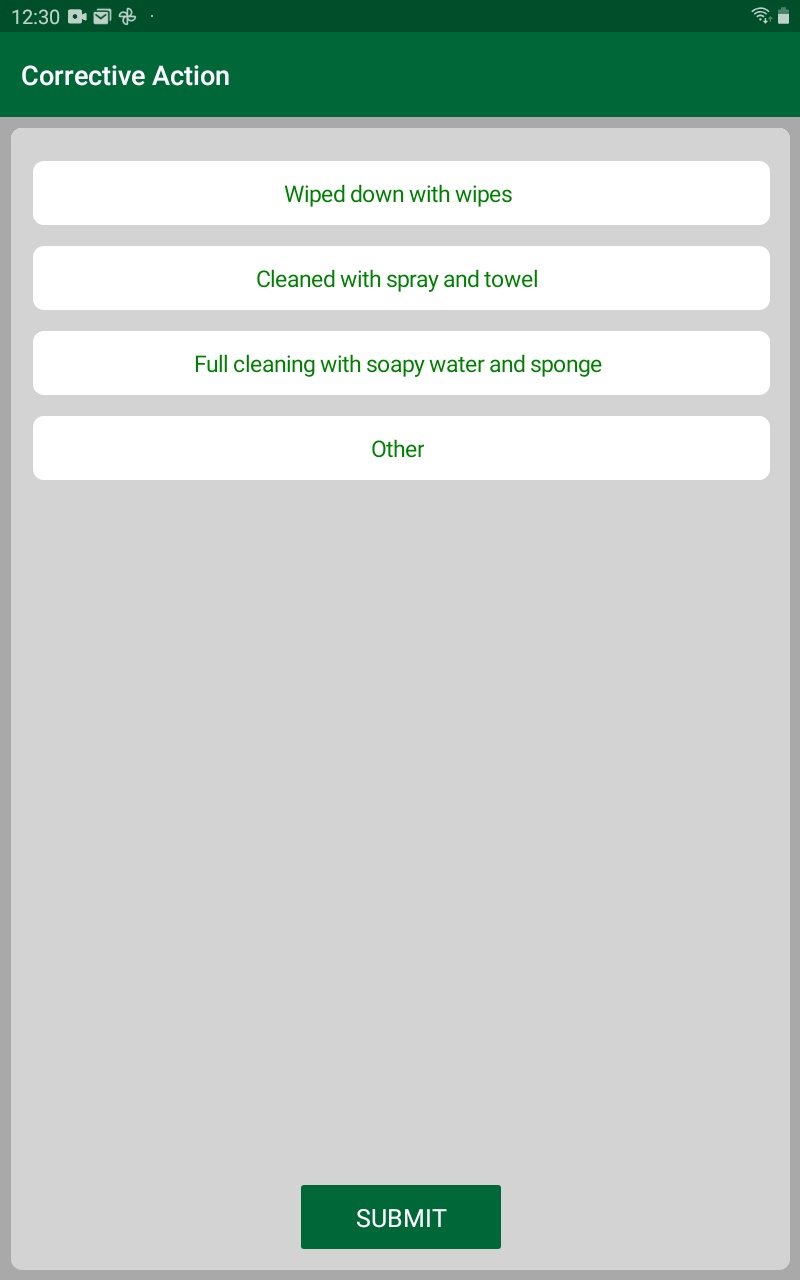
A list of available Corrective Actions appears at the bottom of the form:
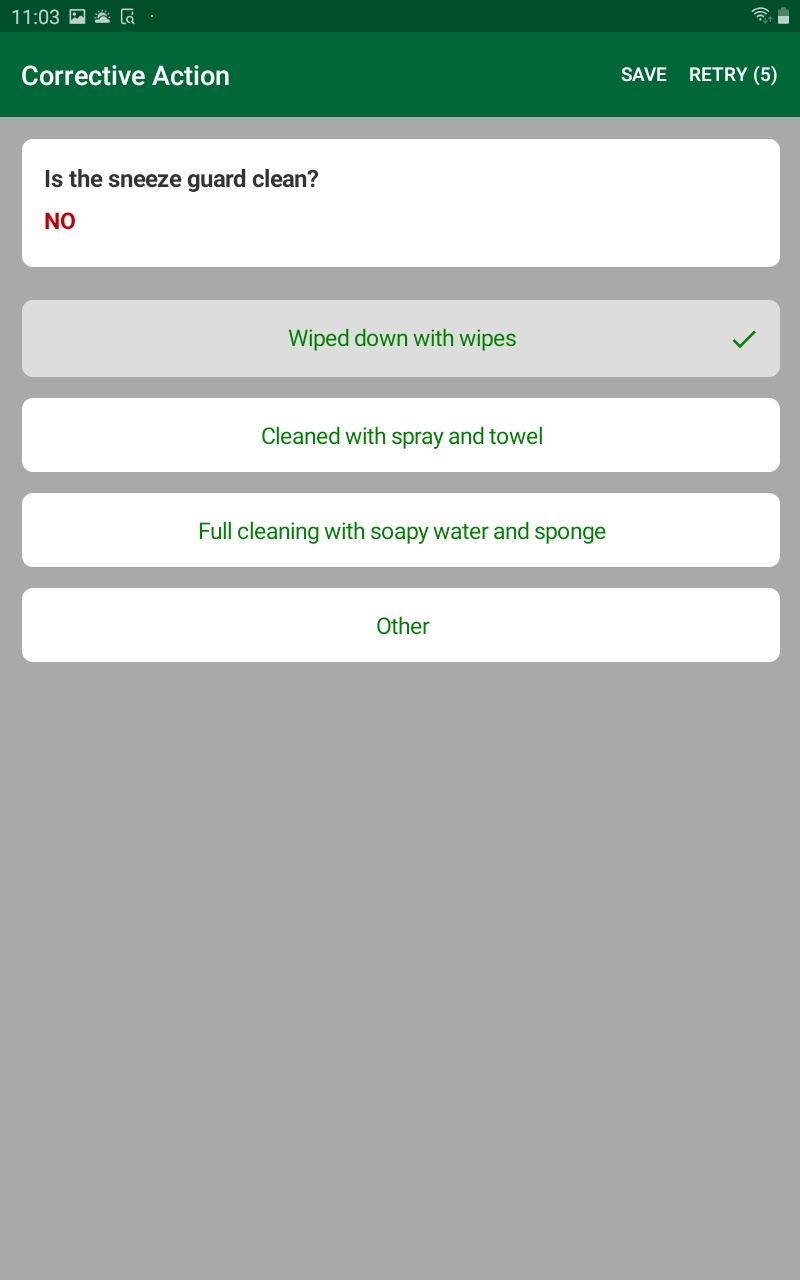
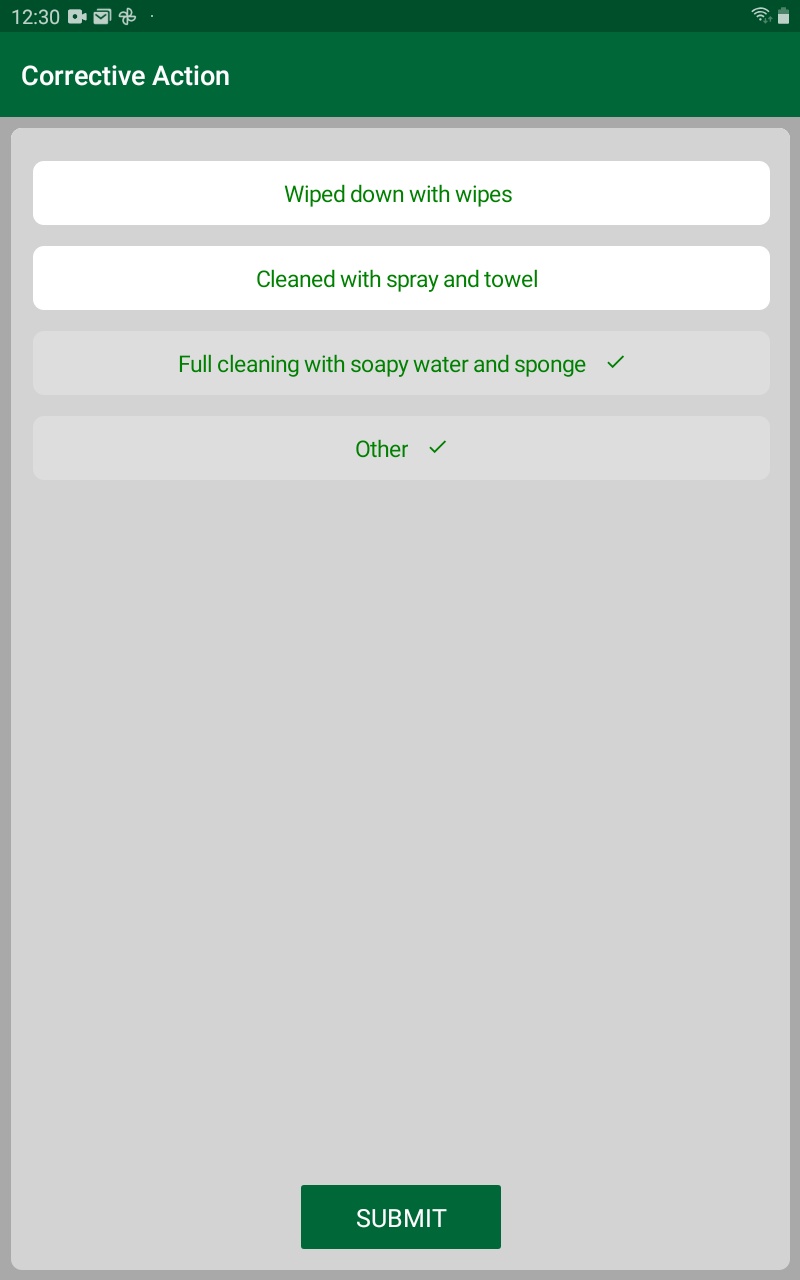
- Tap on the appropriate corrective action card:
- You can select more than one card by tapping on each one you want to use.
- You can unselect a card by tapping on it again.
- You can also tap on the Other card, if available.
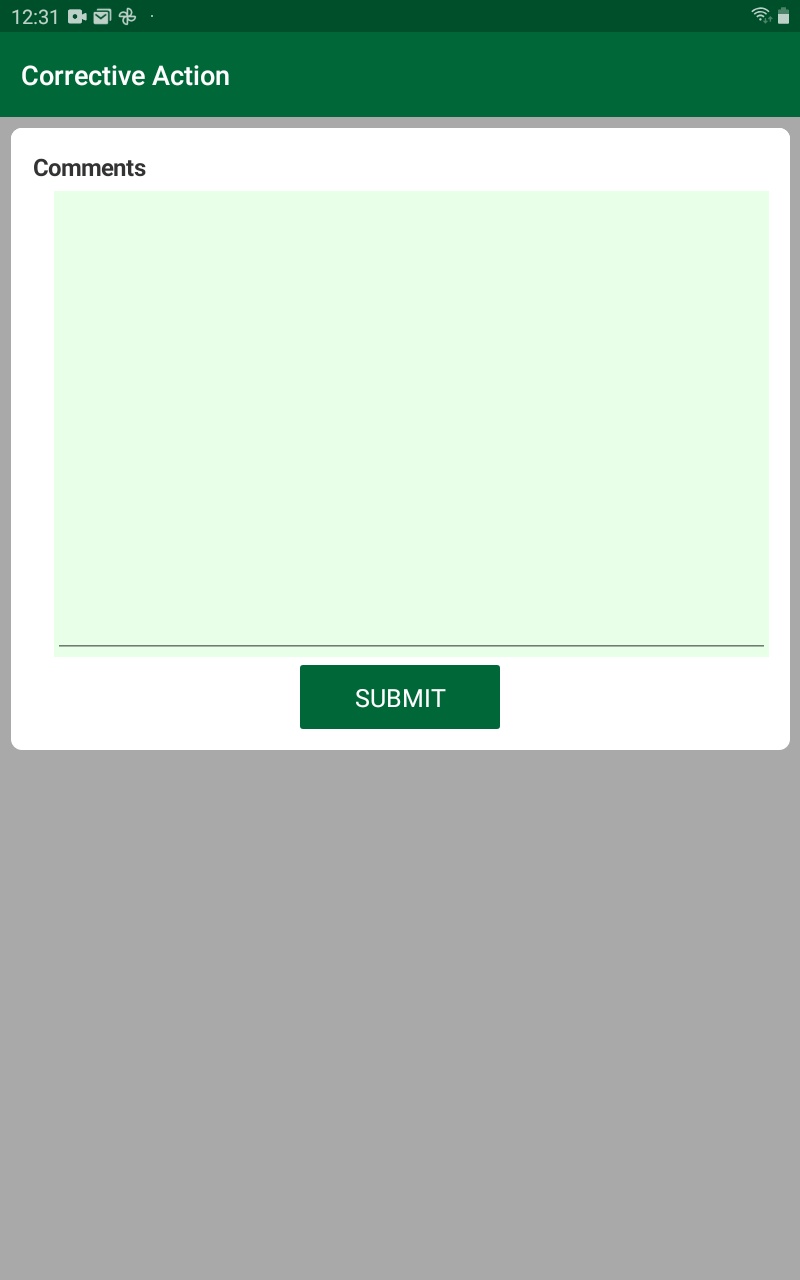
- Tap Save on the banner. The Comments form appears:
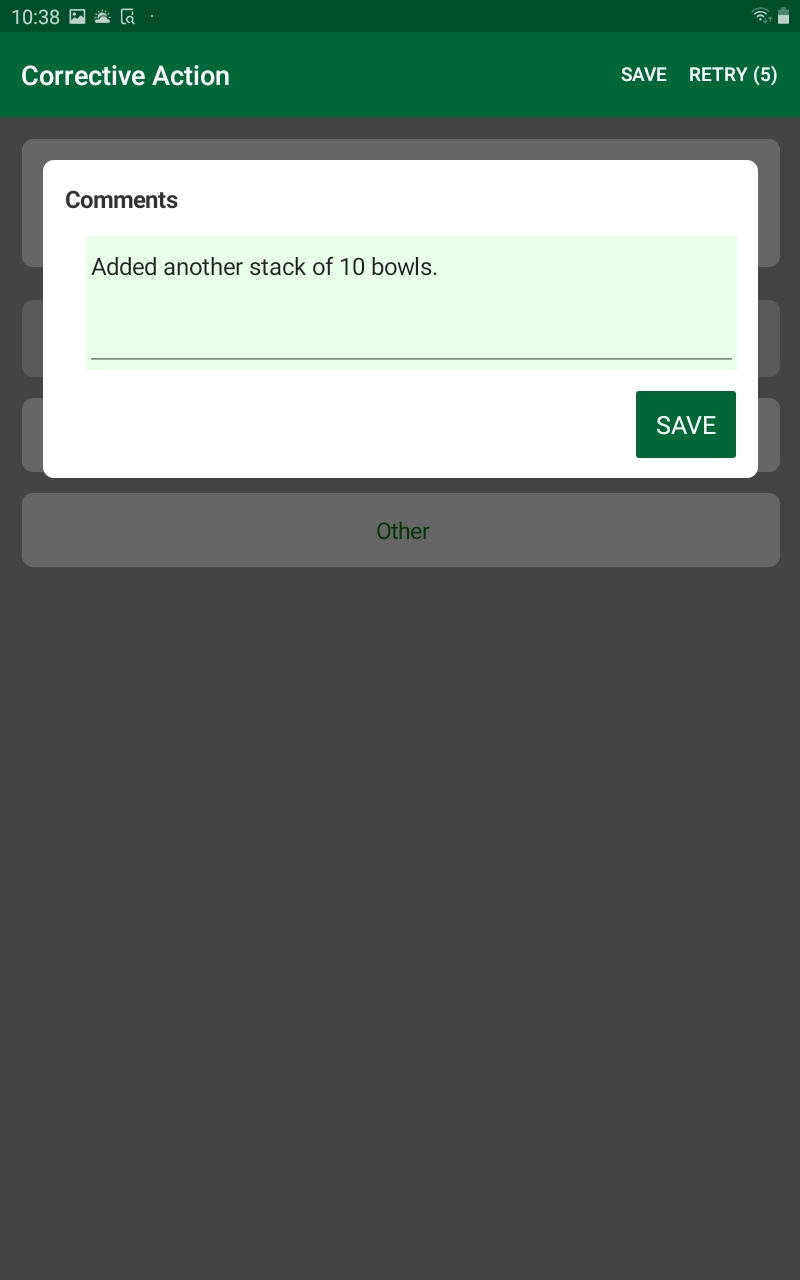
- Enter comments regarding the value entered and the corrective actions selected.
- Tap Save. The system checks to see if any items are remaining on the checklist as described in To complete an open checklist.
|
- Tap Select Correctives:

A list of available actions appears:
- Proceed as follows:
- To select a corrective action, tap on it. The background will turn grey and a checkmark will appear to the right. Repeat to select another.
- To deselect a corrective action, tap on it again. The background will turn white and the checkmark will be removed.
- When finished, tap Submit. The Corrective Actions screen will appear, and the Select Correctives card will be updated to include the number of action you selected. A checkmark will also appear to the left of the number to indicate the task has been completed:

- If you selected Other, a Comments dialog appears before the Corrective Actions screen. Enter a description of what other action was taken and tap Submit.
- If you need to modify the correction actions you selected, tap the Select Correctives card again. The list of available actions appears with those previously selected in grey with a checkmark. Modify the selection, as needed, and click Submit.
|
Adding Text to a Corrective Action
|
| Not applicable. This was handled by entering Comments, above. |
To add text to a corrective action, carry out the following:
- Tap Add Text:

The Comments dialog appears:

- Enter the text you want to included with the corrective action record and tap Submit. The Corrective Actions screen will appear, and the Add Text card will be updated to include a checkmark to indicate text has been added.

- If you need to modify the text you entered, tap the Add Text card again and the Comment dialog will open with the previous text entered. Modify the text, as needed, and click Submit.
|
Updating the Photo Gallery for a Corrective Action
|
| This functionality was not available in this version. |
To update the photo gallery for a corrective action, carry out the following:
- Tap Update Photo Gallery:

The photo gallery screen appears:
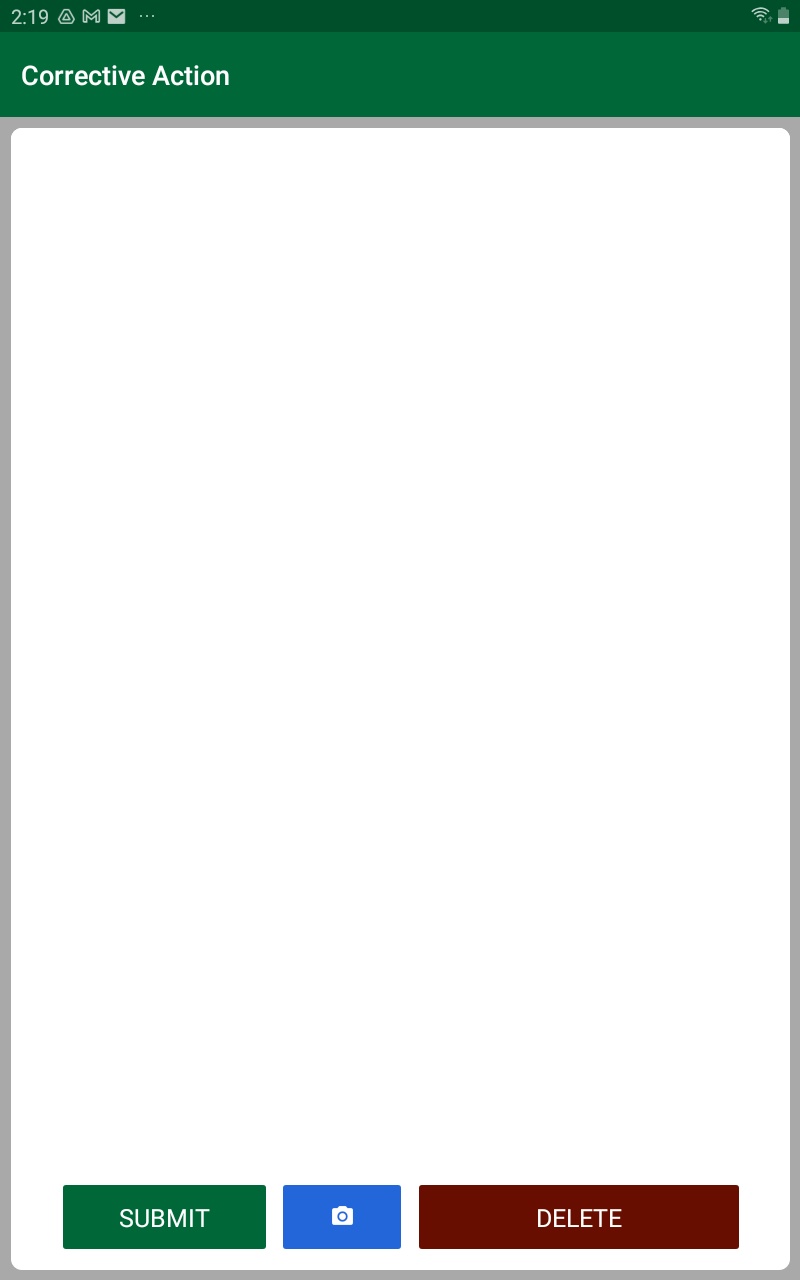 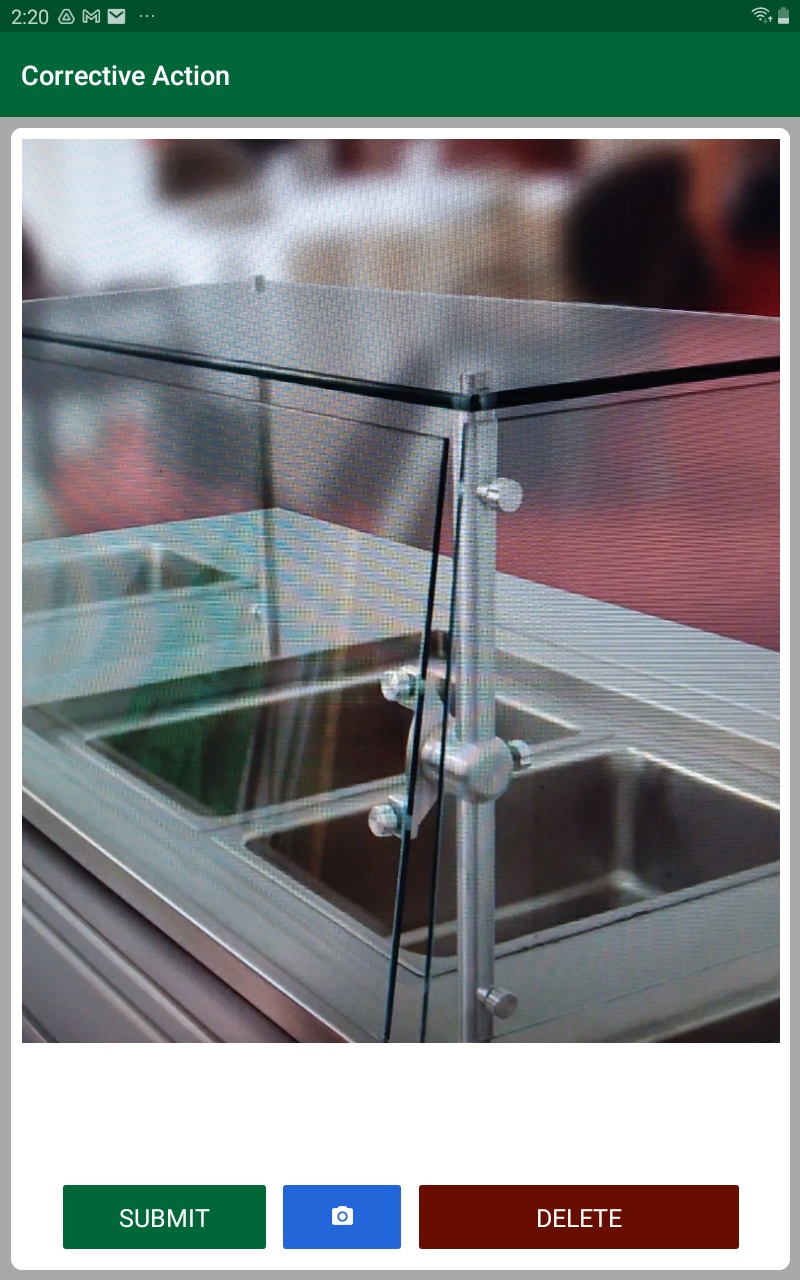
- If no photos have been previously added to the gallery for the corrective action record, the screen is blank.
- If photos have been previously added to the gallery, the first picture in the gallery appears. You can swipe left or right to scroll through the images if there are more than one.
- Proceed as follows:
- To add a photo to the gallery, tap on the image button (blue camera icon):

The tablets camera is activated:
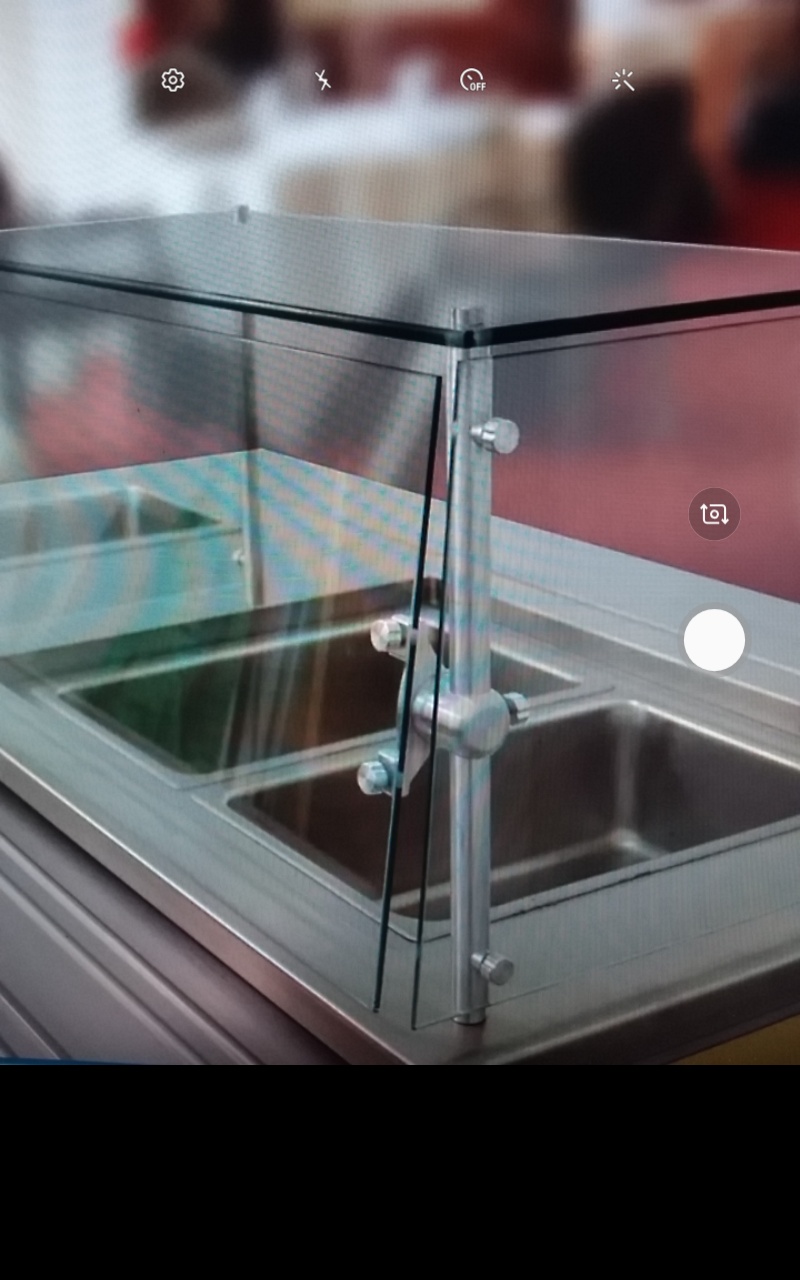 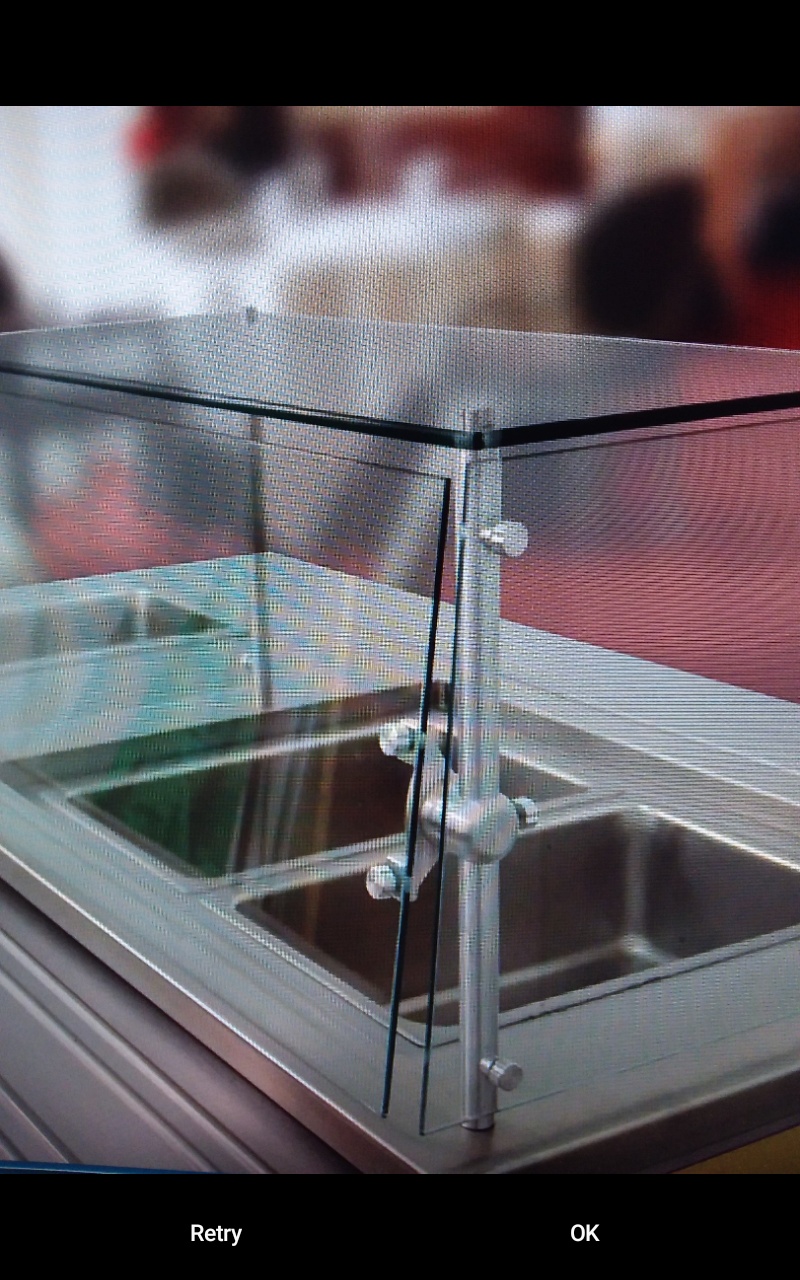
- Take the picture.
- If acceptable, tap OK. The picture is added to the gallery.
- If not acceptable, tap Retry, and take a new picture.
- To delete a photo from the gallery, scroll to the photo and tap Delete:

The photo is removed from the gallery (note, there is no delete confirmation).
- When finished working with the gallery, tap Submit:

The Corrective Actions screen will appear. The Select Correctives card will be updated to include the number of photos in the gallery. A checkmark will also appear to the left of the number to indicate the task has been completed

- If you need to update the gallery, tap the Update Photo Gallery card again. Update the gallery, as needed, and click Submit.
|
Comments
0 comments
Please sign in to leave a comment.